

How to Sell a House in Canada?


What You Should Know
- You can sell a house in Canada with a real estate agent or privately without a listing agent, often called for sale by owner or FSBO.
- Before listing your home, estimate the main selling costs, including real estate commission (~3% - ~7%), legal fees, mortgage discharge costs, repairs, staging, moving costs, and applicable taxes.
- The selling process can take from 30 to 90+ days, depending on the local market, pricing, property condition, buyer financing, and closing timeline.
- A well-priced home with strong listing photos, accurate property details, and broad exposure is more likely to attract serious buyers.
- Selling a tenanted property, condo, inherited home, or non-principal residence may involve extra legal, tax, or disclosure considerations.
- Working with an experienced real estate agent, lawyer, or notary can help reduce risk, especially when reviewing offers, negotiating conditions, and completing closing paperwork.
How to Sell a House in Canada?
Selling a house can be one of the biggest financial decisions for a lot of people, and therefore, it is important to be well prepared to avoid any costly mistakes. Sellers often wonder what needs to be done before selling a house. Many sellers are met with unexpected costs, fees and taxes upon selling their house that affect their financial calculations. This can be a particularly overwhelming journey with a lot of questions and doubts along the way. Here is a step-by-step guide to selling a house that can help answer all your questions and guide you through the process of selling.

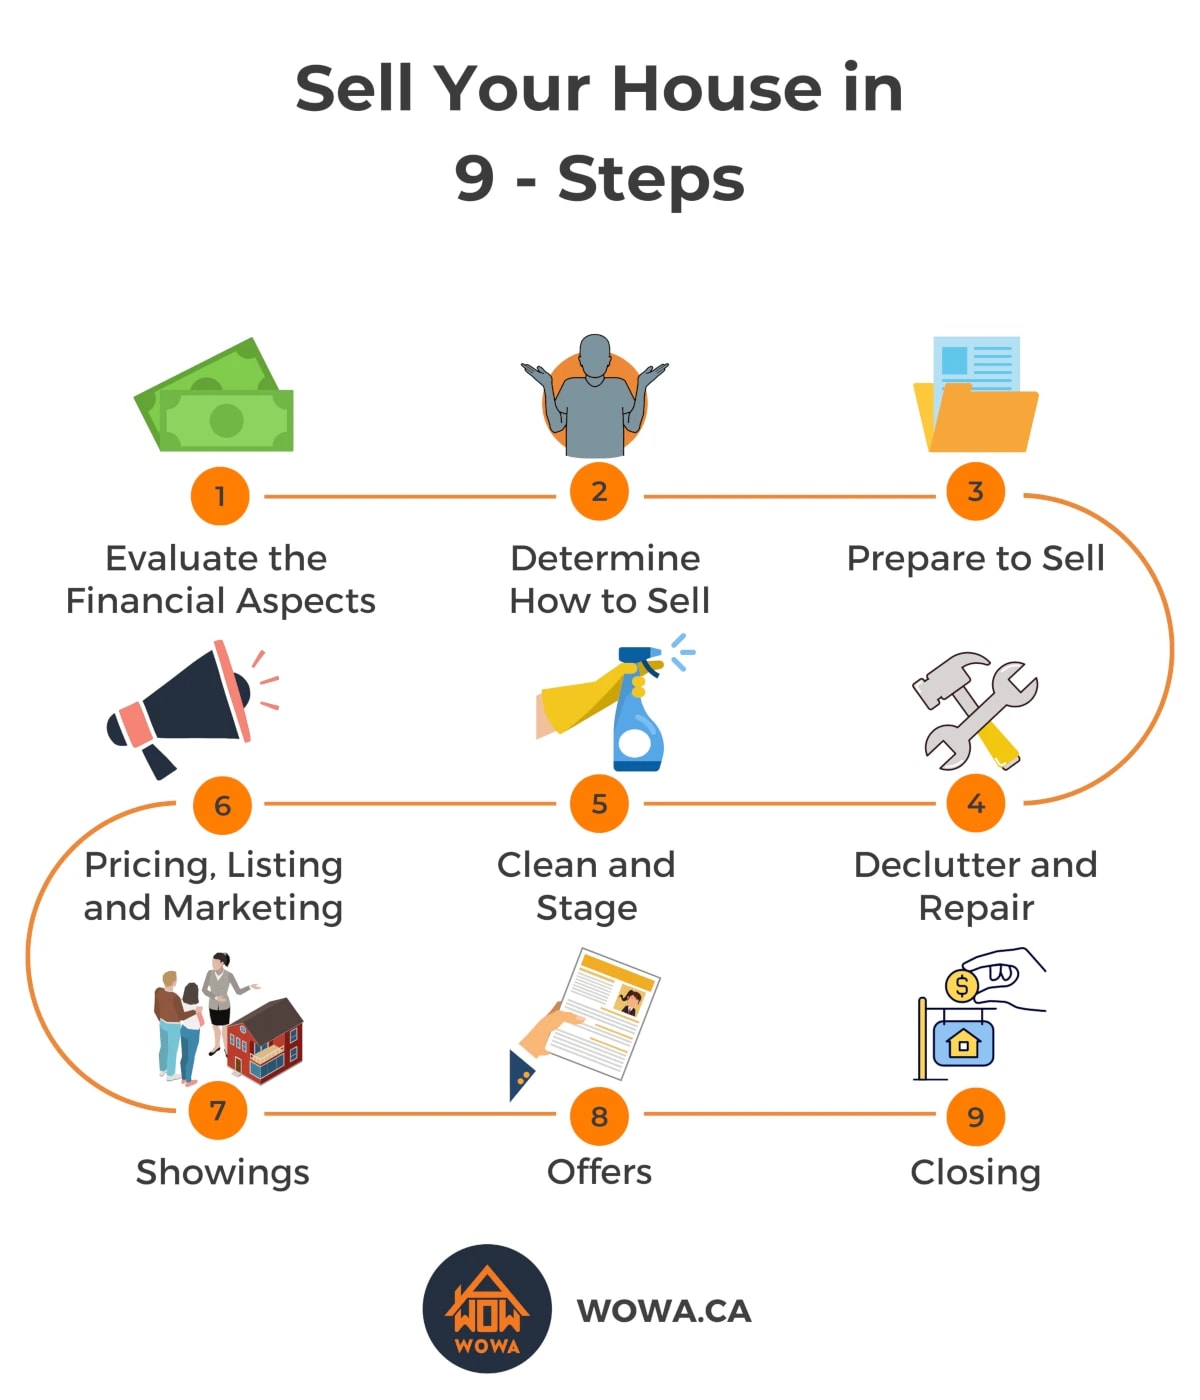
Step 1: Evaluate the Financial Aspects
The first step of selling a house is to estimate the value of your house, calculate all the costs associated with selling your house and understand the tax implications that could apply. This would help you determine the net proceeds you would earn from the transaction.
Estimating the house value: A comparative market analysis (CMA) can help you estimate the value of your home. Typically completed by a real estate agent, this process involves comparing recently sold properties in your area that are similar to your property in terms of age, size and type. This comparison helps determine an approximate market value of your house. In case your house needs any repair work, you could also determine an after repair value (ARV) for your house. Our free home value estimator will help you get started.
Cost of selling a house: Closing costs when selling a house commonly include the cost of repairs, real estate agent commission, sales tax on the agent commission and lawyer fees. However, there can be other associated costs such as appraisal fee, cost of staging, cost of advertising or marketing, cleaning fees and cost of moving that should also be accounted for. Some of the costs may also be covered in the real estate agent fees. Apart from these, if you're selling a house with a mortgage, you may be subject to a mortgage prepayment penalty depending on the lending terms.
Type of Cost Approximate Amount Real estate agent commission 3% - 7% of the sale price (+GST/HST) Cost of Repairs Can range from a few hundreds to thousands depending on the scope Lawyer Fees $700 - $1500 Appraisal Fee $300 - $500 Staging Cost $650 - $3,000+ (depending on existing furniture, size of the house and duration of staging) Marketing Cost $1,200 - $3,000 Moving Cost $100 - $2,500+ (depending on number of rooms and inclusion of packing help) Cleaning Fee $150-$650+ (depending on size and type of property) Taxes for selling a house: If you sell a property that is not your principal residence, you may have to report a capital gain. In most cases, only a portion (50%) of the capital gain is taxable and is added to your income. The applicable inclusion rate and tax treatment depend on the tax year, property use, ownership period, and whether the sale is considered a capital transaction or business income.
Under Canada's residential property flipping rule, a gain from selling a Canadian housing unit, or a right to acquire one, that was owned or held for less than 365 consecutive days is generally deemed business income rather than a capital gain, unless an exception applies.
If you are not a resident of Canada for tax purposes, special tax rules apply when selling Canadian real estate. The seller may need to request a Certificate of Compliance from the Canada Revenue Agency, usually by filing Form T2062. If the certificate is not available by closing, the buyer may be required to withhold a portion of the sale price and remit it to the CRA. This withholding can be much larger than the seller’s actual tax owing, and the seller may need to file a Canadian tax return after the sale to report the gain and recover any excess withholding.
Non-resident sellers should speak with a Canadian tax professional before listing the property, since these rules can affect the closing timeline, the paperwork required, and the amount of sale proceeds released to the seller.
Step 2: Determine How to Sell
Sell through a real estate agent: The most conventional way is to sell through a real estate agent. Real estate agents typically charge the seller a commission which they split with the buyer’s agent. This commission ranges between 3-7% of the selling price of the house, with 5% being an industry average. To put in perspective, if your house is sold for $1,000,000, you would end up paying on an average $50,000 in commission. Typically, a real estate agent helps you determine the value of your home through a comparative market analysis (CMA), takes care of staging and listing your house on the MLS system, and finds potential buyers for your home. As you would be paying a significant commission to your agent, it is advisable to talk to multiple agents with relevant experience in your area to find the best suited agent for all your needs. Check out some real estate agents with verified transactions in your area.
For Sale by Owner (FSBO): Some homeowners choose to sell their home privately, without hiring a listing agent. This is often called for sale by owner or FSBO. Sellers may choose this option to save on listing-agent commission, because they already have a buyer, or because they want more control over the sale process.
Selling without a listing agent does not necessarily mean selling without costs. The seller may still choose to offer commission to a buyer’s agent, and they may need to pay for services such as MLS® exposure, professional photos, advertising, legal advice, staging, or document preparation.
In an FSBO sale, the homeowner is responsible for many tasks that a listing agent would normally handle. This may include setting the asking price, preparing and staging the property, arranging photos, marketing the listing, responding to inquiries, scheduling showings, reviewing offers, negotiating terms, and checking whether buyers are financially qualified.
FSBO can work well when the seller already has a serious buyer or has significant experience with real estate transactions. However, it can also be time-consuming and may reduce exposure to buyers, especially if the property is not listed on MLS® or if buyer agents are less familiar with the listing. Sellers should carefully compare the potential commission savings with the extra work, risk, and possible effect on the final sale price.
Selling with a Real Estate Agent For Sale by Owner (FSBO) The agent takes care of listing and marketing your house. You have to get your property listed through a third party and manage the marketing yourself. The agent does a comparative market analysis to help determine a price you could get for your house. You will have to do all the research by yourself. The agent will find potential buyers and arrange for showings. You have to find potential buyers yourself and manage showings. The agent will manage the contract, help with the negotiations and help you pick the best offer. You have to assess the offers yourself and negotiate with the buyers on your own. You will pay your listing agent and the buyer's agent. You will be required to pay the buyer’s agent unless negotiated with the buyer. iBuyers: iBuyers, cash-home buyers, and "sell as-is" companies may offer to buy homes quickly, often with fewer conditions than a traditional buyer. This option may appeal to sellers who prioritize speed or convenience, but the offer price is typically lower than what the seller could receive on the open market. Availability varies by city and company, so sellers should compare the offer with recent comparable sales and understand all fees before accepting.
Step 3: Prepare to Sell
Once you've decided how to sell, you'll want to get a few things in place: a rough timeline, the required documents, a sale-ready home, and the right professional help.
Determine when to sell: Timing matters as much as method. Real estate markets in larger cities tend to be seasonal and shift throughout the year. Market conditions, competition from other listings in your neighbourhood, and your own personal goals all factor into the right time to sell. Your agent can advise you on local timing.
Gather your documents: Collect everything related to the home — utility bills, property tax records, and appliance warranties and manuals, among others. Your real estate agent may ask for copies of these.
Get your home inspected: It's a good idea to have your home inspected by a professional to uncover any issues that may need repair before they jeopardize a sale.
List the necessary repairs and upgrades: Based on the inspection, you can decide which issues to fix and whether to upgrade parts of the home to increase its value. Either way, you must disclose known issues to buyers, along with any repairs or upgrades you've made.
Find a good real estate lawyer: A home sale is a legal transaction that transfers title from seller to buyer. A capable real estate lawyer helps ensure you're legally protected throughout. While a lawyer's active role comes mainly when the contract is drawn up and at closing, it's worth bringing one on early — especially if you're selling privately — so you can get advice at any point and aren't scrambling to find someone later. Consider speaking with a few lawyers before choosing one. Lawyer fees for selling a house typically run between $700 and $1,500.
Step 4: Declutter, Repair and Renovate
Getting your home ready for sale can take time, so it's best to start early. The longer you've lived in a house, the more possessions you tend to accumulate, so begin by decluttering — donate or sell anything you no longer need. The fewer items you have, the easier your home will be to stage. Professional decluttering and organizing services can also help with this process.
This is also a good time to make repairs and upgrades that add value. Buyers are drawn to homes that are in good condition, and even simple improvements like a fresh coat of paint can give your house new life. If needed, you may be able to use a home renovation loan to cover these expenses.

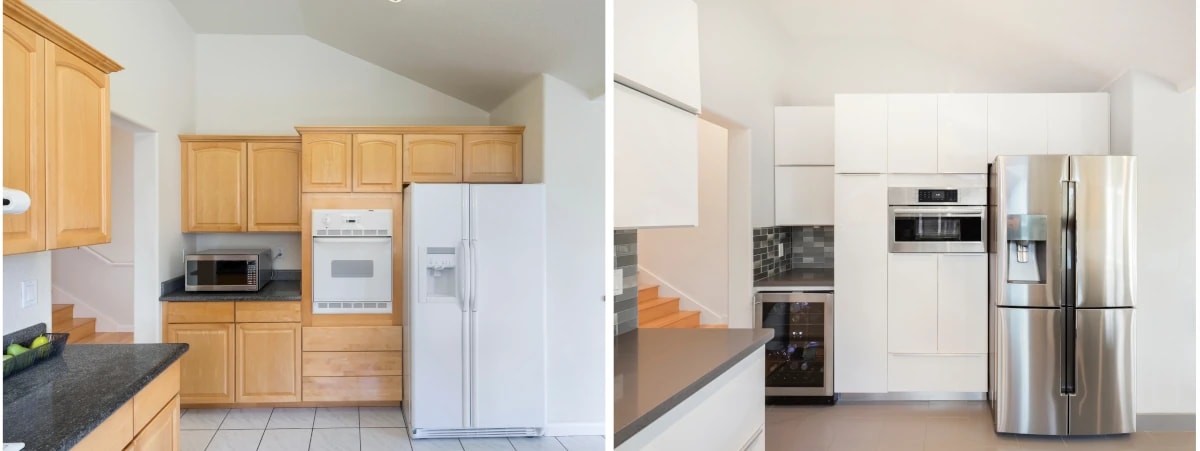
Common repairs and upgrades that sellers choose to make include:
Painting: A fresh coat of paint is the quickest, easiest way to refresh a home, and many sellers paint before listing. Our paint calculator can help you estimate the time, money, and paint required.
Kitchen renovation: A minor update might mean new appliances or countertops, adding an island, or painting the cabinets. A full renovation involves removing the existing cabinets and island and remodelling with new finishes and fixtures, and a complete remodel may change the layout entirely, requiring significant electrical and plumbing work. Kitchen remodels typically cost between $5,000 and $40,000, depending on size and scope.
Bathroom renovation: Like kitchens, bathrooms can be lightly updated or fully remodelled. Work may include replacing the vanity, repairing or replacing wall and floor tiles, swapping out faucets, showerheads, fixtures and fittings, installing new shower enclosures, and handling any plumbing, electrical, and painting. A basic bathroom remodel costs around $7,000, while luxury remodels can run upwards of $55,000.
Finishing the basement: Finishing an unfinished basement adds value and, depending on size, can create extra living space or even a full guest suite. Basement finishing typically costs between $35 and $55 per square foot.
Adding closet systems: Proper closet systems that improve storage can deliver a strong return on investment. A simple installation costs between $1,200 and $3,000.
Backyard, garden, and exterior upgrades: Outdoor space is one of the main reasons people buy detached and semi-detached homes. Repairing broken fences, restaining the deck, adding a gazebo, barbecue, or hot tub, landscaping the garden, and painting the exterior can all help the home sell faster.
Replacing window coverings and weather stripping: New window coverings and fresh weather stripping on doors and windows give the home a neater, better-maintained look.
Energy-efficiency upgrades: With more eco-conscious buyers in the market, improving energy efficiency can pay off. Efficient systems save buyers money over time, and many are willing to pay more for them. Common upgrades include energy-saving lighting, solar panels, high-performance windows, and better insulation. Federal and provincial retrofit programs may be available from time to time to help offset the cost.
Updating light fixtures: Replacing outdated fixtures improves both light quality and energy efficiency — both appealing to buyers.
Treating for termites and pests: Arrange a termite inspection and handle any termite treatment or pest control if needed.
That said, assess carefully what's worth fixing, since not every repair or upgrade adds value or speeds up a sale — you can lose money on unnecessary improvements if you don't weigh their worth first. Your agent can advise on which repairs and upgrades are likely to help.
Step 5: Clean and Stage
Cleaning and staging your home can boost its appeal and attract more buyers. A clean, well-maintained exterior and entryway make a strong first impression, while tidy walkways, cared-for gardens and fences, and clean, decluttered interiors all help set the right tone. It's often worth deep cleaning the house and power washing the exterior before showings.
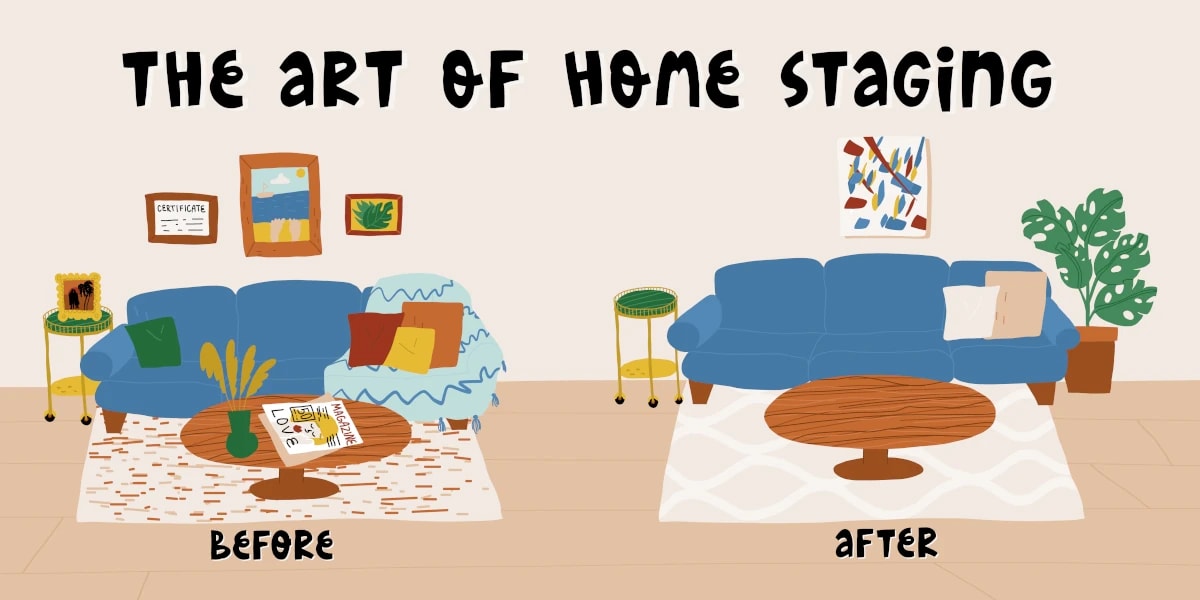
Staging the rooms helps buyers picture furniture arrangements and get a sense of each room's size. Professional stagers use complementary furniture and accessories to present the home at its best.
An inviting atmosphere goes a long way toward attracting buyers. That said, staging can be expensive, so weigh the cost against the value it's likely to add before deciding. Some real estate agents will cover part or all of the staging costs out of their marketing budget, so it's worth discussing this with your agent.

Step 6: Pricing, Listing and Marketing
At this stage, your house is ready to be sold so you must now fix a selling price and advertise the sale.
Pricing: Once your home is ready to list, you will need to set an asking price. At this stage, you may already have a general idea of your home's market value based on comparable sales, but choosing the right list price is a strategic decision rather than just a calculation.
If you are selling privately (FSBO), you can review recent sales of similar homes in your area to estimate a reasonable price. If you are working with a real estate agent, they will usually provide a comparative market analysis (CMA) and guide you in selecting a price based on current market conditions, recent sales, and active listings. You may also choose to obtain a professional appraisal for an independent estimate of value.
Your pricing strategy can influence both how quickly your home sells and the final sale price. Pricing at or slightly below market value may attract more buyers and, in competitive markets, can lead to multiple offers. Pricing at market value aims for a balanced approach, while overpricing can reduce buyer interest and lead to longer time on the market or future price reductions.
Market conditions also play an important role. In strong seller's markets, buyers may compete and bid above the asking price, while in slower markets, buyers may negotiate below the list price. Regardless of strategy, there is no guarantee of the final sale price, so sellers should set expectations based on current local conditions and their priorities.
Listing: Once you have decided on an asking price, the next step is to list your home for sale. Most sellers want their property to appear on MLS® Systems and public real estate websites such as REALTOR.ca, since these platforms can give the listing broad exposure to buyers and buyer agents.
In Canada, sellers generally cannot post directly to MLS® Systems or REALTOR.ca on their own. Listings are usually submitted through a licensed real estate professional. If you are selling privately, also known as for sale by owner or FSBO, you may be able to use a flat-fee or "mere posting" service to have your property listed on MLS®/REALTOR.ca. Some real estate agents or brokerages may also offer fixed-fee listing services instead of full-service representation.
Your listing should include complete, accurate, and clear information about the property, including the asking price, location, property type, number of bedrooms and bathrooms, lot size, key features, recent upgrades, property taxes, condo or maintenance fees if applicable, and any important restrictions or disclosures.
High-quality photos are one of the most important parts of a listing because they often create the buyer's first impression. Professional photography, proper lighting, decluttering, and staging can help buyers understand the layout and appeal of the home. In some cases, sellers may also use floor plans, virtual tours, or video walkthroughs to make the listing more useful and attractive.
Advertising and Marketing: Real estate agents typically promote listings across a mix of online and print channels to maximize exposure. This can include real estate websites and MLS®/REALTOR.ca, social media such as Facebook and Instagram, email campaigns, flyers, real estate publications, and “for sale” signage. If you are selling privately (FSBO), you can handle this advertising yourself, though reach may be more limited without MLS® exposure.
Your agent may also organize an open house, which lets multiple prospective buyers tour the home within a set window. Turnout varies widely depending on location, price point, and current market conditions, but open houses can be a useful way to generate interest and gather feedback from buyers and their agents.
You or your agent can also arrange virtual showings or video walkthroughs, which allow buyers to view the home remotely.
Step 7: Showings
Once your house is on the market, potential buyers fix appointments to come see your house. Most buyers prefer evening or weekend showings. Keep the following in mind at this stage:
- Ensure your agent has an approved access method, such as a lockbox or scheduled access instructions, for buyer-agent showings.
- Share the date and time availability for showings depending on your schedule. Doing this beforehand can help the agents to plan showings smoothly.
- Make sure you leave the house before every showing. It is not advisable to be around when the potential buyers come to see the house.
- Keep the house extremely clean during this time. Make sure the floors are vacuumed and mopped, the beds are made, there's no foul smell, toilet lids are closed, dirty dishes are loaded into the dishwasher, and everything is neat and in order.
- Some people choose to move out for a few days during this time, especially when there are multiple showings scheduled everyday.
- Ensure you don't leave any valuables out in the open.
Step 8: Offers
How soon you get an offer on your house greatly depends on market conditions. Some sellers in very hot markets start getting offers within days of listing their property, while some sellers may have to wait for months before getting an offer. A seller may get multiple offers on their property sometimes, with the buyers being caught in a bidding war. There can be two kinds of offers:
Conditional Offer: A conditional offer is an offer that becomes firm only after certain conditions are satisfied or waived within a specified period. Common conditions include financing approval, a satisfactory home inspection, review of condo documents, or the sale of the buyer’s current home. The buyer and seller can negotiate which conditions are included, the deadline for satisfying them, and what happens if they are not met. If the conditions are not fulfilled or waived by the deadline stated in the agreement, the deal may not proceed, and the buyer’s deposit is usually returned according to the terms of the agreement.
Unconditional Offer: An unconditional offer is an offer with no conditions for the buyer to satisfy before the agreement becomes firm. These offers are more common in a seller’s market, where demand is high, supply is limited, and buyers may compete for the same property.
For sellers, an unconditional offer can be attractive because it gives the buyer fewer ways to back out of the deal before closing. However, it does not guarantee that the transaction will close in every circumstance. If either party fails to complete the sale, there may still be legal and financial consequences.
In a multiple-offer situation, sellers may compare unconditional offers with conditional offers, along with the offered price, deposit amount, closing date, and other terms, before choosing the offer that works best for them.
After getting an offer from the buyer(s), you could choose to accept it, decline it or negotiate it. Your real estate agent can help you compare multiple offers to select the most suitable one.
Once both parties arrive at an agreement, the offer is signed by both and becomes a formal contract. The buyer pays a deposit as security in an act of good faith. This amount varies across Canada.
Deposit: In most real estate transactions, the buyer provides a deposit along with the offer or shortly after acceptance. The deposit is typically a percentage of the purchase price (often around 1% to 5%, but it can vary by market and property value) and is held in trust by the listing brokerage or a legal representative. It is applied toward the buyer's purchase price on closing.
For sellers, a larger deposit can make an offer more attractive because it signals stronger buyer commitment. If the deal becomes firm and the buyer later fails to complete the purchase, the seller may be entitled to receive the deposit, depending on the terms of the agreement.
Step 9: Closing
The entire process of closing usually takes 30-45 days between the signing of the agreement and the final date of closing. You could expect the following steps during this process:
Inspection: If the agreement includes a condition to inspect, the buyer would hire a professional to come and inspect the house. This could take 2-3 hours depending on the size of the house. The inspector would prepare a report listing all the issues they have uncovered. The buyer may request you to fix those issues. It is up to you to fix those issues, offer a credit to the buyer for the repairs or to reject the request at the risk of the sale being canceled.
Repairs as per the purchase agreement: If there were any repairs mentioned in the purchase agreement, this is the time you would undertake those.
Lender's appraisal: If the buyer is taking a mortgage from a lender to buy your house, the lender may arrange for an appraisal to ensure that the value of the home is in line with the market standards.
Clear title: The buyer’s lawyer would conduct a title search to ensure that the property legally belongs to you and is yours to sell. If any problems arise such as pending claims, you would have to pay them off at the earliest to ensure that the sale goes through. Your lawyer may give solutions under such circumstances. If you got title insurance when you purchased the home, it would protect you against any debts of the previous owners or any claims against the title.
Clean and prepare to move: The seller should leave the property in the condition required by the purchase agreement, including any agreed repairs, included fixtures and chattels, and cleanliness requirements.
Notify authorities: This is usually done by your lawyer and involves notifying utility companies and the city of the impending transfer of ownership.
Sign the documents and review the statement of adjustment: A day or two before the closing date, your lawyer would require you to sign all the paperwork for the transfer of ownership. You would also be able to review the statement of adjustment (also called settlement statement) that summarizes the financial details of the deal including all fees and credits paid and owed by the seller. This would have details of payments of property taxes, condo fees, parking permits and more and they will be adjusted in sale. For example if the sale is closed in March and you have paid property taxes up to July, the buyer would pay you the tax amount from March to July. You would also leave all the keys with your lawyer.
Closing Date: The closing date is when the deal is closed with the sale proceeds being transferred to you through your lawyer and the title being transferred to the buyer. This means that you have successfully sold your house and are no longer the owner of the said property. At this point, the sale is complete.
Conclusion
Selling a house can feel like a very daunting task requiring lots of patience. The above checklist for selling a house can help you cover all the bases and set you on the right path. Working with a knowledgeable team of real estate agents and lawyers can get you the best deal for your house and help minimize the risks. Market conditions vary from time to time and you could seek expert advice regarding them. You should always have realistic expectations and should not rush into making decisions.
Frequently Asked Questions
The most common fees you could expect to pay when selling a house are:
- Real estate agent fees (and GST/HST on the fees)
- Lawyer Fees
- Inspection Fees
- Appraisal Fees
- Cleaning Fees
- Staging Fees
Apart from these you should also account for cost of repair and moving costs and cost of advertising and marketing.
What are the rules for selling a house with tenants?A property can generally be sold whether it is vacant, owner-occupied, or tenant-occupied. The sale of the property does not automatically end the tenancy. Unless the tenant agrees to move out or the tenancy is legally terminated, the buyer usually takes over as the new landlord under the existing lease or rental arrangement.
Selling a tenanted property can make the process more complicated. Some buyers, especially investors, may be comfortable purchasing a property with tenants already in place. Other buyers may want to live in the home themselves or choose their own tenants, which means they may ask for vacant possession before closing. In that case, the seller must be careful not to promise vacant possession unless they are confident it can be legally delivered.
Tenants can also affect the practical side of selling a home. The seller may need to give proper notice before showings, coordinate access with the tenants, and respect the tenant's right to privacy and reasonable enjoyment of the property. A tenanted home may also be harder to stage, photograph, or show on short notice.
Because tenancy laws vary by province, sellers should check their local rules before listing a tenanted property or accepting an offer that requires vacant possession.
Can I sell a house with tenants in Ontario?Yes. In Ontario, you can sell a property while it is occupied by tenants. However, selling the property does not automatically end the tenancy. If the tenant remains in the home after closing, the buyer generally becomes the new landlord and takes over the existing lease or rental arrangement.
If the buyer, the buyer's spouse, child, parent, or certain caregivers genuinely intend to live in the unit, the seller may be able to give the tenant an N12 notice for the purchaser's own use after an agreement of purchase and sale has been signed. This process has strict requirements, including proper notice, compensation, eligibility rules, and good-faith occupancy by the buyer or qualifying person.
A lease clause that says the tenancy ends when the property is sold generally cannot replace Ontario's legal eviction process. Sellers should avoid promising vacant possession unless the tenant has agreed to move out or the seller is confident that vacant possession can be delivered legally and on time.
Who pays the property taxes when selling a house?The seller pays the property tax up to the closing date for the particular year. The buyer pays the property tax for the rest of the year.
What is the paperwork required for selling a house without an agent?The Agreement of Purchase and Sale is the core sale contract, but additional documents may be required depending on the province, property type, financing, tenancy, condo status, and tax residency of the seller. For example:
- The original 'Residential Sale Contract' from when you purchased the house.
- Property Tax receipts.
- Property Appraisal Report from a certified appraiser.
- Home Inspection Certificate.
- List of Chattels. Be sure to include manuals and warranty documents of chattels such as stoves, ovens and dishwashers.
- Utility payment receipts.
- Invoices of repairs or renovations.
- Condo corporation documents (or homeowners'/strata association rules) if applicable — for a condo, this typically includes the declaration, bylaws, rules, recent financial statements, the reserve fund study, and an estoppel/status certificate.
- Some blank copies of offer and counteroffer forms.
- Residential Property Disclosure Form.
- 'Rental Agreements' if you have rented the property.
- Any forms that may be required by the buyer’s agent to ensure their commission will be paid.
- Keep your bank information handy.
Apart from these, your lawyer may provide you or direct you to arrange for some more documents depending on your unique situation.
Disclaimer:
- Any analysis or commentary reflects the opinions of WOWA.ca analysts and should not be considered financial advice. Please consult a licensed professional before making any decisions.
- The calculators and content on this page are for general information only. WOWA® does not guarantee the accuracy and is not responsible for any consequences of using the calculator.
- Financial institutions and brokerages may compensate us for connecting customers to them through payments for advertisements, clicks, and leads.
- Interest rates are sourced from financial institutions' websites or provided to us directly. Real estate data is sourced from the Canadian Real Estate Association (CREA) and regional boards' websites and documents.